Virtualization technology makes it possible to run multiple operating systems simultaneously on your Windows computer. This guide walks you through activating virtualization in your system BIOS and setting up the necessary Windows features.
Access BIOS through Windows settings
The modern way to reach your BIOS settings uses Windows’ built-in tools. Here’s what you need to do:
- Launch the Settings app from your Start menu or press Windows+I on your keyboard

- Select the System option from the main Settings screen
- Find and click Recovery in the right panel

- Under Recovery options, locate Advanced startup and click the Restart now button

- When prompted, confirm by clicking Restart now

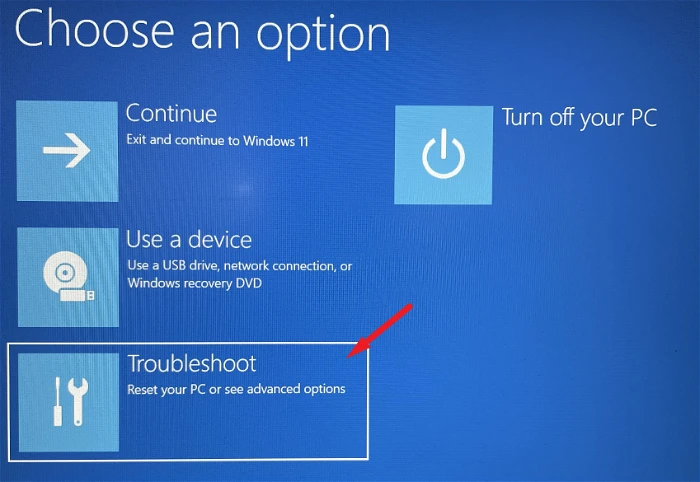
- After the restart, select Troubleshoot from the menu
- Choose Advanced options from the next screen

- Select UEFI Firmware Settings to enter BIOS

- Navigate to BIOS Setup using arrow keys

-
Go to the Configuration section
-
Find and enable Virtualization Technology
- Save changes with F10 and restart your computer
Set up Windows virtualization features
After enabling BIOS virtualization, configure Windows to support virtual machines:
- Open Control Panel through the Start menu search

- Click Programs and Features

- Select Turn Windows features on or off from the left side

- Check the box next to Hyper-V

- Enable Virtual Machine Platform as well

- Click OK to apply changes

- Restart your computer when prompted
