Navigating Excel with the arrow keys is super important for getting work done efficiently. But sometimes, you might find that instead of moving between cells, the whole sheet starts scrolling! This usually happens when Scroll Lock is on. If your keyboard doesn’t have a dedicated Scroll Lock key, figuring out how to turn it off can be a pain. Luckily, there are a few methods to get it sorted.
Checking if Scroll Lock is Enabled
Before you try turning it off, let’s make sure it’s actually on in Excel.
- Take a look at the status bar at the very bottom of your Excel window. If “Scroll Lock” is displayed there, it’s definitely enabled.
- If you don’t see “Scroll Lock” on the status bar, you’ll need to add it. Right-click anywhere on the status bar to bring up a menu.
- From the menu, just click the “Scroll Lock” option to select it. Now, the status bar will show you when Scroll Lock is active.


Method 1: Disabling Scroll Lock with VBA
For quickly disabling Scroll Lock, especially if you deal with multiple sheets, VBA is the way to go.
- First, you’ll need to enable the Developer tab in Excel. Go to File > Options > Customize Ribbon. Check the “Developer” box in the list on the right, and click OK.
- Now, click on the Developer tab and select “Visual Basic” from the Code group to open the VBA editor. You can also use the shortcut
Alt+F11.
- In the VBA editor, click Insert > Module to create a new module.
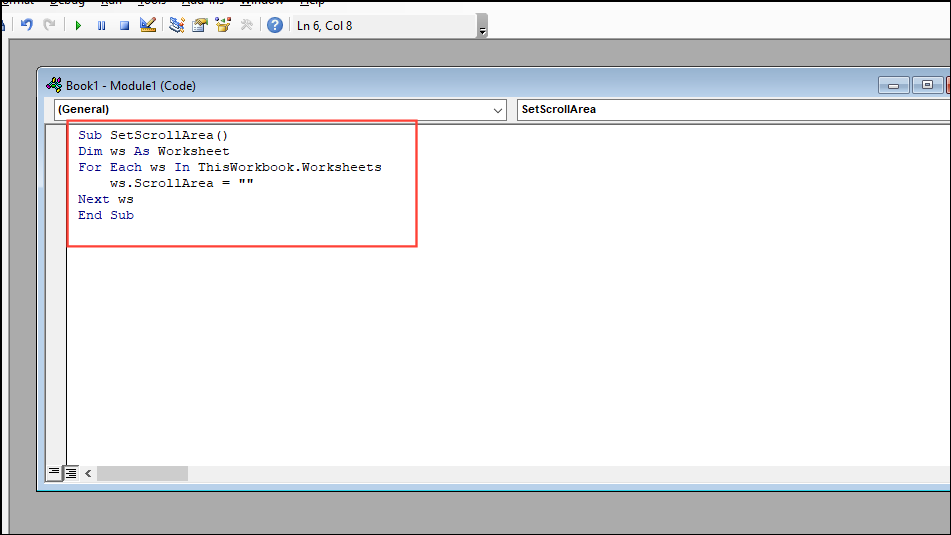
- Copy and paste the following code into the module window:


Sub DisableScrollLock()
    Dim ws As Worksheet
    For Each ws In ThisWorkbook.Worksheets
        ws.ScrollArea = ""
    Next ws
End Sub
- Close the VBA editor and go back to Excel. Press
Alt+F8to open the Macro dialog box. - Choose “DisableScrollLock” from the list and click “Run”. This will clear any scroll area restrictions, effectively disabling Scroll Lock for all sheets in the workbook.
Method 2: From the Properties Menu
If you notice you can only scroll within a limited area of your spreadsheet, this is likely due to the ‘ScrollArea’ property. You can fix it this way:
- Enable the Developer tab as outlined in Method 1.
- Go to the Developer tab and click on “Properties” in the Controls group.
- In the Properties pane, find the “ScrollArea” field.
- If there’s anything written in the ScrollArea field, delete it. This will remove any restrictions on scrolling and navigation.
- Close the Properties pane. Now you should be able to move freely throughout the entire worksheet using the arrow keys and scroll bars.


Method 3: Using the On-Screen Keyboard
If you don’t have a Scroll Lock key, the on-screen keyboard in Windows is handy:
- Open the On-Screen Keyboard by pressing
Ctrl+Windows+O. You can also find it by searching for “On-Screen Keyboard” in the Start Menu. - When the keyboard appears, look for the “ScrLk” (Scroll Lock) key. If it’s highlighted, it means Scroll Lock is on.
- Click the “ScrLk” key to turn it off. The key’s color should change, indicating Scroll Lock is no longer active.

Method 4: Through the Options Menu
If you are missing scroll bars and this makes navigation difficult, adjust your settings:
- With your Excel workbook open, click “File” at the top-left corner of the window.
- In the sidebar, select “Options” at the bottom-left to open the Excel Options dialog.
- Click “Advanced” in the left-hand menu to see more settings.
- Scroll down to the “Display options for this workbook” section. Ensure “Show horizontal scroll bar” and “Show vertical scroll bar” are both checked.
- Click “OK” to apply the changes. The scroll bars will now be visible, making navigation much easier.


These methods should help you disable Scroll Lock in Excel, whether you have a dedicated key or not. These approaches work on any Windows system and make navigating spreadsheets smooth and easy.