Is your Windows 11 PC acting up? Frequent crashes, weird errors, or even the dreaded blue screen can point to corrupted or missing system files. These problems can pop up after power failures, malware attacks, hardware glitches, or botched updates. The good news is that Windows 11 has a bunch of built-in tools to help you fix or replace these problematic files and get your system running smoothly again.
Method 1: Using DISM Commands to Repair Corrupted Files
The Deployment Image Servicing and Management (DISM) tool is a real workhorse. It can scan your system for damaged files and download fresh replacements directly from Microsoft’s servers. It’s especially useful if the System File Checker (SFC) isn’t cutting it.
-
First, open Command Prompt as an administrator. Just hit the Start button or the search icon, type
Command Promptorcmd, and then click “Run as administrator”. -
In the Command Prompt, type the following command and press
Enterto do a health scan:DISM /Online /Cleanup-image /Scanhealth -
Once the scan is done, run this command to restore any corrupted files:
DISM /Online /Cleanup-Image /RestoreHealth


Let the process run without interruption. DISM will grab the necessary files from Windows Update. After it’s finished, restart your PC to apply the changes.
Heads up: If you’re offline, you can still do an offline repair using Windows installation media. Just pop in the media and tweak the command to specify the source:
DISM /Online /Cleanup-Image /RestoreHealth /Source:F:\Sources\Install.wim:1 /LimitAccess
Remember to replace F: with the actual drive letter of your installation media.

Method 2: Scan for and Fix Corrupt Files using System File Checker
The System File Checker (SFC) is another handy Windows tool that scans for and repairs corrupted system files. It replaces them using cached copies.
-
Open Command Prompt as admin. Type
Command Promptorcmdin the search, right-click and selectRun as administrator. -
Now, type this command and press
Enterto start the scan:sfc /scannow

SFC will now check all your protected system files and replace anything that looks off.
-
Give it time to finish – it could take a little while. When it’s done, you might see one of these messages:
- “Windows Resource Protection did not find any integrity violations.”
- “Windows Resource Protection found corrupt files and successfully repaired them.”
- “Windows Resource Protection found corrupt files but was unable to fix some of them.”
If SFC fixed some files, restart your computer. If issues persist, try using the DISM tool as described earlier.
Different Parameters
The SFC command has some extra tricks up its sleeve if you need them:
sfc /verifyonly: Checks for problems without doing any repairs.sfc /scanfile=<file>: Scans and fixes just a specific file.sfc /verifyfile=<file>: Checks a specific file without repairing it.sfc /offbootdir=<bootdir> /offwindir=<windir>: Use this for offline repairs.

View and Analyze System File Checker Logs
SFC keeps a log file with all the details of its scans and repairs.
-
Go to
C:\Windows\Logs\CBS\CBS.logusing File Explorer. -
Open the
CBS.logfile using Notepad to take a look at the scan results.

If you want to filter the log for relevant entries, use this command:
findstr /c:"[SR]" %windir%\Logs\CBS\CBS.log > "C:\SFClogs\sfclogs.txt"

Method 3: Running SFC in Safe Mode
If some third-party apps are getting in the way of the repair process, running SFC in Safe Mode can help.
-
Press
Windows+R, typemsconfig, and hitEnterto open System Configuration.
-
In the
Boottab, check theSafe bootbox, clickApply, and thenOK.
-
Restart your computer to boot into Safe Mode.

-
Once you’re in Safe Mode, run the
sfc /scannowcommand from an elevated Command Prompt.

-
After the scan, switch back to normal boot mode by unchecking
Safe bootin System Configuration and restarting your PC.
Method 4: Using Startup Repair
If corrupted files are preventing your system from booting up, the Startup Repair tool can help.
-
Open Settings by pressing
Windows+I, go toSystem, and thenRecovery. -
Under
Advanced startup, clickRestart now. -
In the Windows Recovery Environment, choose
Troubleshoot. -
Select
Advanced options, then chooseStartup Repair. -
The tool will try to fix anything that’s stopping Windows from starting.


Method 5: Running SFC Scan Before Windows Starts
If SFC can’t fix files while Windows is running, try running it from the recovery environment.
-
Boot into the Windows Recovery Environment. You can do this by interrupting the boot process three times or using installation media.
-
Choose
Troubleshoot, thenAdvanced options, thenCommand Prompt. -
Use the following command to identify the drive letters, since they might be different in the recovery mode:
wmic logicaldisk get deviceid, volumename, description -
Now, run the SFC scan. Replace
X:andF:\Windowswith the correct boot and Windows directories:sfc /scannow /offbootdir=X:\ /offwindir=F:\Windows -
Once the scan is finished, restart your PC.


Method 6: Perform System Restore
System Restore can revert your system files and settings to an earlier point, which can help fix corruption issues.
-
Search for
Create a restore pointand open it. -
In the System Protection tab, click
System Restore. -
Pick a restore point from before the issues started and click
Next. -
Confirm your choice and click
Finishto begin the restore.


Method 7: Manually Replace the Corrupted Files
As a last resort, you can manually replace corrupted files with healthy ones.
-
Find the corrupted files by checking the SFC log, which you can find at
C:\Windows\Logs\CBS\CBS.log. -
Grab a good copy of the file from another Windows 11 PC or a trusted source.
-
Take ownership of the corrupted file with this command:
takeown /f path\filename
Example:
takeown /f C:\Windows\System32\MUI\0409\mscorees.dll

- Give full permissions:
icacls path\filename /grant administrators:F
Example:
icacls C:\Windows\System32\MUI\0409\mscorees.dll /grant administrators:F

- Replace the corrupted file with the good copy:
copy source path\filename destination path\filename
Example:
copy C:\Users\User\Downloads\mscorees.dll C:\Windows\System32\MUI\0409\mscorees.dll
Confirm the overwrite when prompted.

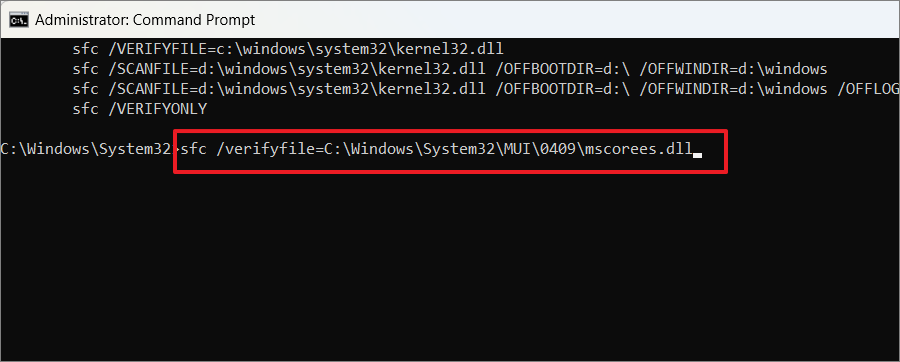
- Verify the integrity of the replaced file:
sfc /verifyfile=C:\Windows\System32\MUI\0409\mscorees.dll
Method 8: Check for Windows Updates
Keeping Windows updated can fix known issues.
-
Open Settings (
Windows+I) and go toWindows Update. -
Click
Check for updatesand install any that are available. -
Restart your PC if it asks you to.

Method 9: Run System Maintenance Troubleshooter
This tool can often fix common system problems.
-
Open the Control Panel and set the view to
Large icons. -
Select
Troubleshooting, then clickView allon the left. -
Choose
System Maintenanceand run it as an administrator.


Method 10: Run Check Disk Command (CHKDSK)
CHKDSK scans your file system and fixes errors.
-
Open Command Prompt as an administrator.
-
Run this command (replace
C:with your drive letter):
chkdsk C: /f /r /x

- If prompted, type
Yto schedule the scan for the next restart, then reboot your computer.
Method 11: Perform a Check on the Drive Using the Error Check Function
You can check for errors via drive properties too.
-
In File Explorer, right-click on the drive and pick
Properties. -
Under the
Toolstab, clickCheck.


- Follow the prompts to scan and fix any errors found.
Method 12: Reset Your Windows 11 PC
If nothing else works, resetting Windows will reinstall the operating system, potentially resolving deeply embedded issues.
-
Open Settings, go to
System, and selectRecovery. -
Under
Reset this PC, clickReset PC. -
Choose whether to
Keep my filesorRemove everything. -
Select
Cloud downloadto get the newest version of Windows 11. -
Follow the steps and click
Resetto get the process started.


By working through these methods, you should be able to repair corrupted system files on your Windows 11 PC, which will help your system run smoother and more stably.